
What to Do the Moment You Find a Roof Leak
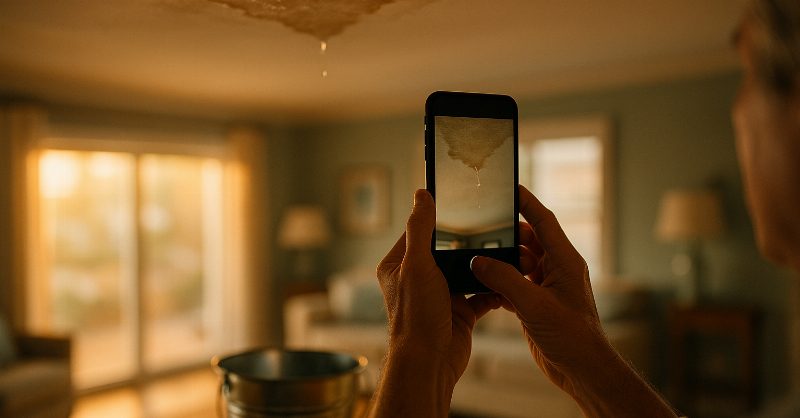
A wet ceiling stain at 2 a.m. during a summer thunderstorm is one of the most stressful things a Florida homeowner can face. Your instinct is right to act fast, because water is patient and relentless, and every minute it sits inside your home it is finding new places to go.
This guide walks you through exactly what to do, in order, from the first drip you notice to the moment a professional takes over. No filler, no panic, just a clear sequence that protects your home and your wallet.
Step 1: Move fast to limit the water damage inside
The first priority is not the roof. The first priority is everything inside your home that water is about to ruin.
- Grab buckets, towels, and trash cans. Place them under any active drip. Use old towels to soak up standing water on floors, especially hardwood or laminate, which can warp in under an hour.
- Move furniture, electronics, and rugs. Even a small leak can arc sideways as it travels down rafters or insulation before falling. Widen your clearance zone around the drip point.
- Protect your attic access. If you have pull-down attic stairs, cover the opening with a plastic sheet or tarp before you go up. You do not want water tracking back down into living spaces.
One action that many homeowners skip: if you see a bulge or blister forming in your drywall ceiling, poke a small hole in the center with a screwdriver. It sounds counterintuitive, but a controlled release prevents a sudden ceiling collapse that sends a much larger volume of water onto your floors and belongings.
Step 2: Find the source, but be realistic about what you can see
Water is a master of misdirection. Where a leak appears on your ceiling is almost never directly below where water is entering your roof. On a pitched roof, water travels along rafters, sheathing, and insulation before dripping down, sometimes traveling several feet horizontally before it falls.
Inside the attic, look for:
- Active dripping or wet insulation
- Dark water stains on rafters or the underside of the sheathing
- Daylight visible through the roof deck (a serious sign)
- Wet or compressed insulation batts
On the roof surface itself, the most common sources are:
- Damaged or missing shingles near the leak location
- Failed flashing around chimneys, skylights, vents, and pipe boots
- Clogged gutters causing water to back up under the roofline
- Cracked ridge caps or open seams at roof valleys
Our post on physical signs your roof needs replacing, not just patching goes deeper on what separates a patchable problem from something more serious. Worth a read before you assume this is a small fix.
Step 3: Temporary weatherproofing, done safely
If the rain is still coming down, do not get on your roof. A wet roof is dangerous, full stop. Florida roofs in summer are especially treacherous because the surface temperature can exceed 160 degrees when dry, and when wet, even low-slope areas become slick fast.
What you can do safely from the ground or a ladder to the eave level:
- Cover exposed areas from inside the attic. Spread a heavy plastic tarp or sheet of polyethylene over the wet section of roof deck from below, tucking the edges under insulation or securing with boards.
- From outside, only at eave height. If a section of shingle has visibly blown off and you can see it from the ground, a roofer can tarp it properly when they arrive. Calling ahead to describe the damage helps them come prepared.
- Use roofing tape for a small, accessible puncture. If you have a small, clearly visible hole on a low-slope section you can safely reach, heavy-duty roofing tape (butyl tape) can buy a few hours. This is a temporary measure, not a repair.
If a major storm event has caused widespread damage in your neighborhood, such as after a tropical system, tarping by professionals may be covered under your homeowner's insurance. See our detailed walkthrough on how to file a roof insurance claim in Florida the right way before you sign anything or pay anyone out of pocket.
Step 4: Document everything before you touch more
Before you throw away wet insulation or start patching, document the damage thoroughly. This protects your insurance claim and your negotiating position with any contractor.
- Take photos and short video clips of every wet area, stain, damaged shingle, lifted flashing, and interior damage. Capture timestamps if your phone does that automatically.
- Note the date, time, and weather conditions. If this leak followed a specific storm, that matters for your insurance carrier.
- Check your attic insulation. Wet insulation loses its R-value and can promote mold growth within 24 to 48 hours in Florida's humidity. Photograph it in place before any removal.
- Write down every item damaged, including rugs, furniture, electronics, and flooring. Even modest losses add up and can be included in a claim.
The documentation habit feels tedious in the moment, but homeowners who skip it often find themselves under-compensated or in disputes with their insurer weeks later.
Step 5: Call a roofing professional, the same day if possible
A leak is not a situation where you want to wait for a weekday appointment. In Sarasota, Bradenton, Lakewood Ranch, Venice, and across the Suncoast, summer rain events can compound damage quickly. A small leak that began during a Tuesday afternoon storm can soak insulation, start mold, and weaken sheathing by Thursday if left unaddressed.
When you call, be ready to share:
- The approximate location of the leak on the roof (front left, above the master bedroom, near the chimney, etc.)
- Whether you have an attic and whether you have been up there
- What the weather has been doing (ongoing storms, recent high winds)
- The age of your roof if you know it
That last point matters more than many homeowners realize. Our blog post on how long a roof really lasts on the Suncoast explains how Florida's UV exposure, heat cycling, and hurricane-season stress accelerate shingle degradation compared to the national averages you might read about online. If your roof is approaching 15 to 20 years old, a single active leak often signals broader wear rather than one isolated problem.
Step 6: Understand what a proper inspection will cover
When a roofer arrives, a thorough leak investigation goes beyond glancing at the ceiling. A qualified inspector looks at the full system: decking, underlayment, flashing, penetrations, ridge and hip caps, gutters, and ventilation.
Our post covering what a roof inspection actually checks, and how often you need one, walks through each component in detail. Reading it beforehand means you can have a more informed conversation and ask the right questions when the roofer walks through their findings with you.
What separates a rushed estimate from a real inspection:
- The roofer actually gets on the roof, not just looks from the driveway
- Flashing at every penetration is checked, not just the area near the visible leak
- The attic is assessed for moisture, ventilation issues, and structural concerns
- Written findings are provided, not just a verbal quote
You should be wary of any contractor who quotes a repair price before seeing the roof and attic in person.
Common mistakes Suncoast homeowners make with roof leaks
Waiting for the rain to stop, then forgetting. Florida summer rains often end as quickly as they start. The sun comes back out, the ceiling dries, and the urgency evaporates. Until the next storm. A dried stain does not mean the problem is gone; it means conditions were temporarily favorable. The entry point is still there.
Patching from the inside. Hydraulic cement or roofing sealant applied to the underside of the decking from inside the attic is not a repair. It is a delay. Water will find its way around it, and now you have a harder time seeing where.
Assuming one missing shingle is the whole story. In many cases, the shingle that blew off was already compromised, and its neighbors are not far behind. A repair that addresses only the most obvious damage often leads to another call in the same season.
DIY caulk around flashing. Flashing failures are one of the most common sources of leaks in the Sarasota and Bradenton area, especially around pipe boots on older homes. Caulk over deteriorated flashing is a temporary mask, not a fix. The flashing usually needs to be re-bedded or replaced.
When repair is the right call and when it is not
Some leaks genuinely are isolated: a single pipe boot seal fails, a valley piece lifts, one row of shingles takes a direct hit from a branch. These can be repaired cost-effectively and carry years of remaining life alongside them.
Others are symptoms of a roof that has simply reached the end of its service life. If your roof is more than 15 years old, if the inspector finds multiple failing areas, or if the decking has soft spots, repair money is often better applied toward replacement. Our post on how to know when your Florida roof is done and needs replacing rather than repairing walks through that decision honestly, without steering you toward the more expensive option by default.
Local considerations: why the Suncoast environment matters
Homeowners who moved to the Sarasota area from the Midwest or Northeast sometimes underestimate how differently a Florida roof ages. The combination of intense UV radiation, 90-degree-plus heat from May through October, high humidity, frequent afternoon thunderstorms, and hurricane-season wind loads creates a more punishing environment than most of the country.
Homes on or near the water, whether on Anna Maria Island, Siesta Key, or along Englewood's bay-front streets, add salt air into that mix. Salt accelerates the oxidation of metal flashing and fasteners, which is why coastal properties often see flashing failures before the shingles themselves give out.
Homes in newer developments in Lakewood Ranch and Port Charlotte tend to have more consistent construction standards, but are not exempt from storm damage or poor original installations. We cover the whole Suncoast service area, and the variety of roofing issues we see reflects the genuine diversity of building ages and conditions across the region.
If you are in Nokomis, Osprey, or Venice, know that your area sees some of the most intense afternoon storm activity in Sarasota County during peak summer months. Keeping up with routine inspections, especially heading into hurricane season, is the single most effective thing you can do to avoid an emergency call in the middle of a storm.
What to expect after you call us
When you reach out to us about an active or suspected leak, here is what the process looks like. We schedule a same-day or next-day visit whenever conditions allow. The roofer performs a full inspection, documents the findings with photos, and walks you through what they found before leaving. You receive written findings and a written scope of work for any repairs.
We do not pressure you. We explain what we found, what the options are, and what happens if you leave a given issue unaddressed. You make the call with full information.
If the damage is storm-related and you plan to file an insurance claim, we can help you understand the process and what documentation your carrier is likely to need. Learn more about our roofing services and the full range of what we handle across the Suncoast.
A roof leak is stressful, but it is manageable when you act quickly and work with people who know Florida roofs. The worst outcome is always the one where a homeowner waits, hoping the problem will resolve itself. It does not. Water always wins when given enough time.